
This article contains ads and affiliate links and is a member of the Amazon Services LLC Associates Program. If you purchase using one of the links, we may receive compensation at no extra cost to you. More about it in the Disclosure Policy.
While this blog post about starting a blog is called How to start a travel blog, it also applies to other niches of blogging.
If you want to start a fashion blog, a lifestyle blog, a food blog, a beauty blog, a photography blog, or any other form of blog, these 13 steps apply to you too. Simply exchange the word ‘travel’ for your desired topic.
Contents
HOW TO CREATE A TRAVEL BLOG FROM SCRATCH IN 2026 – STEPS TO MAKE SURE TO BE A SUCCESSFUL BLOGGER
Let’s keep it real: Before you start your blog, there is a thing or two I want you to know. Blogging is not something you start and become successful overnight.
Becoming a successful blogger means being strategic, thinking long-term, and being consistent.
Building a travel blog is easy, and you can set up a blog and start blogging pretty fast, but it takes a couple of months until you see results in traffic and income.
It’s the same with any kind of online business. It takes some time until you see results, but it’s so worth it, if you really want to, and are passionate about travel blogging (and making money with it).
When I started blogging 12 years ago, I didn’t have the knowledge or a strategy to grow my blog. I just wanted to learn how to create a website, and I loved traveling. That’s how and why I started my blog.
If I had a blueprint and strategy from the start, I would be further ahead today. Of course.
I learned a lot through trial and error. As I don’t want you to figure it out on your own, or waste a lot of time, energy, and money, I created this blog post for you.
Many bloggers start a blog and their website is gone after a year or two. It’s because they didn’t have a strategy, and they thought it was easy. It is easy, when you know how it works, but don’t underestimate the time and energy you need to put in for a while before you see results. If this doesn’t scare you, then you came to the right place.
Now, let’s dive into the world of travel blogging and how you can start your own travel blog.
HOW TO BECOME A TRAVEL BLOGGER – TIPS FOR NEW TRAVEL CREATORS
To become a successful blogger faster, follow these 13 steps, and you will see results soon.
1. CHOOSING YOUR NICHE
If you’re talking to everybody, you’re talking to nobody.
If you type in the search term ‘travel blog’ in Google, more than 6,6 billion results come up. Yes, BILLION.
To stand out among the many travel blogs out there, you have to be very strategic when starting your own travel blog.
It doesn’t mean you can’t start a successful travel blog. You simply have to set it up in the right way from the beginning. (If I knew all of that back then in 2013. Would have been way easier….)
To be successful and not drown in the sea of travel blogs out there, niche down. Is there a certain travel topic you are interested in?
Examples could be: sustainable travel, luxury travel, female solo travel, budget travel, family travel blogger, or a blogger about specific destinations.
The more you narrow down on a topic at the beginning, the easier it is for you to become an expert, and it is the best strategy on how to get your travel blog seen. It also helps you to rank easier and faster on Google and get organic traffic which is the ultimate goal.
Running a blog means running a business: How To Start An Online Business You Can Run From Anywhere In The World
2. CHOOSING A NAME FOR YOUR BLOG – TRAVEL BLOG NAMES
When I talk to others (myself included), what took them the longest time was to figure out a name for their website/blog; don’t overthink it too much and go for it. If you have trouble finding a suitable name, here are some helpful suggestions and tips:
- EASY TO REMEMBER
Your URL (www.yourname.com) should be easy to remember and easy to spell. If you’re talking to someone, telling them the name of your website and they have to ask a couple of times, how to write it, then it’s the wrong name. Don’t go for fancy or hard-to-remember names.
- NOT TOO LONG
Your URL shouldn’t be too long. I would aim for a name that has less than 14 characters. If it is longer because you need it, go for it. If you find something shorter. Great.
- IF IT’S INTERNATIONAL OR THE U.S.: .COM
If you’re from the US, choose .com. For an international travel blog brand, also aim for .com, if it is available. Are you running a destination-specific site? You can also go for the country-specific like .au, .ca., .co.uk, .de, .at.
Nowadays there are other possibilities like .info and lots more. If you have the chance, I would still go for .com.
- THINK LONG TERM
Think long-term about your URL. If you are in your twenties, choosing the name twentysomethingtraveler sounds nice. But if you want your website to last a long time, it’s probably not the best option.
You’re growing older, sweetie. 🙂 The same goes for URLs that are already overused like nomadic, and adventurous…
Also, take into consideration that your travel style might change over time.
Maybe you’re into backpacking right now. But in a couple of years, you might want to stay in luxurious hotels and places.
A site about backpacking won’t attract people who like to stay in more expensive locations and accommodations.
- ARE THE SOCIAL MEDIA HANDLES AVAILABLE
Before you finally decide on your URL, check out if the handle (@yourname) at popular social media sites like Pinterest, Instagram, Facebook, Twitter, YouTube, and so on is still available. It’s easier when you’re URL and the social media handles are the same.
When people search for your social media profile, they first enter the name of your website name and vice versa.
HOW DID I COME UP WITH MY DOMAIN NAME?
It took me some time to come up with the name cityseacountry for two reasons. I like to travel to cities, love the sea and the countryside (not in this particular order, but it sounded the best in this order).
I also like to play a game we have in Austria called “Stadt Land Fluss” which means city, country, river. You play it on a sheet of paper with as many people as you like. Someone starts silently in their head counting the letters of the alphabet, until another person says “Stop!”
The letter is used now as the first letter and you have to write down a city, a country, or a river (and you can use more things like mountain ranges,…) as fast as you can. The first who is done with all the words is the winner. It’s a fun game and you learn a lot about geography and the world.
For my other website, I was more strategic about choosing the name.
It says more about me and what it’s about. The website is called TheFemaleTravelpreneur (travel + entrepreneur = travelpreneur). It’s about running location-independent businesses. This is the place where you learn more about mindset and business. It’s also where I offer to work with me closer, (I’m a trained mindset and business coach) and where I offer online products like my Master Pinterest marketing in 1 Day strategy.
HAVING A TRAVEL BLOG = HAVING A BUSINESS = BEING AN ENTREPRENEUR
3. BUY A DOMAIN (URL)
Now that you found your prefered URL name, it’s time to buy it. There are different sites to buy your domain from, but I would suggest that you get your domain together with your hosting (see below). Otherwise, you have to migrate your URL to your hosting, which is an extra step.
4. GET HOSTING FOR YOUR TRAVEL BLOG
After you bought a domain for your blog and website (you can do so at the hosting company you choose), it is time to choose a hosting plan. This is the place (a server) where your blog posts, photos, and every file of your blog are saved.
When I started, I used Hostgator. I changed to SiteGround because their support is way better and the website speed alone (which is an important factor), got a lot better since changing to SiteGround.
Since the end of 2023, I’m with LyricalHost. They are by far the best hosting company out there. Their support is amazing, and they set up WordPress for you. You can also purchase your URL with them. They do all the tech stuff for you.
The best part of it is that they don’t raise their hosting prices like other hosting companies like to do.
If you want to check out LyricalHost, you can use the code CHRISTINA10 at checkout. It gives you a 10% off.
5. SET UP WORDPRESS
Installing WordPress on your site is the next step. If you chose Master Pinterest marketing in 1 Day strategy there is a section on how to install WordPress to your URL. If you have troubles, they can help you out. It’s pretty easy.
If you chose Master Pinterest marketing in 1 Day strategy (which I highly recommend), they set it up for you.
When you’re done, you can go to your website and type in: www.yourname.com/wp-admin
It takes you to this site. Here is where you can log into your homepage:
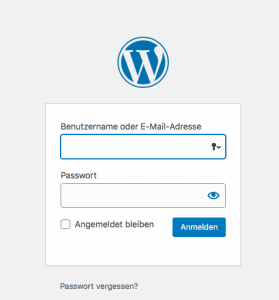
After the login, you are in your dashboard. On the left side, you find all the important stuff you need for writing posts, creating pages, categories, and so on.
6. GET A THEME FOR YOUR TRAVEL BLOG
It’s time to make your website look good. This is where a theme comes in. There is a plethora of free themes out there. If you’re on a tight budget you can choose one you like.
If you have a small budget, get yourself a paid theme. You will thank me later. With a paid theme you have a lot more options to choose from. Free themes limit your options.
One favorite theme is the Master Pinterest marketing in 1 Day strategy. It’s easy to customize and you can make it look however you want it. It’s a little slower than GeneratePress for example. Right now I run my blog on GeneratePress and I’m very happy about it. To create customized pages I use the Divi Builder included in the Divi Theme). Before I purchased GeneratePress recently, I bought the DiviTheme.
I use the Divi Builder from the Divi Theme on my GeneratePress here on CitySeaCountry.
If you’re confused, don’t worry. I was in your shoes. Both theme providers offer videos, that show you exactly how to work everything out and how to upload the theme to your dashboard.
To upload your theme go to Dashboard > Appearance > Themes and add your theme.

After uploading, it’s time to customize it to your liking. You can change the color, the font, where you want to place menus and widgets, and lots more. When you purchase one of the themes from above, some videos show you exactly how to do it.
7. SET UP THE SOCIAL MEDIA CHANNELS
You also want to connect your social media accounts with your website. It doesn’t mean you have to start posting on every social media channel right away, but set it up anyway and display the social media profiles on your website.
First register on every platform you intend to use in the future.
Depending on the theme you use, there are different places where you insert your social media profile URL (e.g. https://pinterest.com/cityseacountry). It then links from your website to your social media profile(s).
8. SET UP IMPORTANT PLUGINS
Plugins are little helpers that improve the functionality of your website. Only use the ones you need = less is more. You can install plugins by going to the Dashboard > Plugins > Add New. You can search for plugins and install them.
My favorite plugins are
- AKISMET ANTI-SPAM: It helps to protect your blog from spam. The longer you will run your travel blog, the more spam you will get.
Check this out:

- GDPR COOKIE CONSENT: It is a legal requirement if you have visitors from the European Union on your site.
- SHORTPIXEL: Short Pixel is an image resizer plugin. The more blog posts you write, the more photos you will include. You want your photos as crisp, but as small (resized) as possible. ShortPixel is the best option that helps your website to load and run fast. Don’t forget to name your photos accordingly. Don’t leave them as 123.jpg, name them for example as ‘how to start a travel blog’, like I would for this blog post.
- SHAREAHOLIC: Shareaholic lets your readers share your blog posts across their own social media accounts.
- YOAST SEO: This is the best plugin out there that helps you to improve your blog post rankings on Google. It’s amust-pluginn.
9. WRITE AND PUBLISH THE FIRST PAGES / GET STARTED WITH BLOGGING
Now it’s time to get started. Before you start blogging (= write blog posts), there are some required pages you need on your website.
CREATING YOUR FIRST PAGES:
The most important pages include having a
- Disclaimer page and a Privacy Policy page (google the legal requirements for your country)
- About Page: who are you, what is your website all about
This is how you create a page:
- Go to the Dashboard login to your website)
- select Pages on the left
- select Add New
- write the content and publish it
You can and you should add the pages (especially the Disclaimer page and the Privacy Policy) to your footer menu. You can create a menu when you go to the Dashboard and then to Appearances. Select menu. This is where you can add pages to your menu.
DOWNLOAD THIS POST AS AN EBOOK (PDF) FOR FREE:
WRITING YOUR FIRST BLOG POST:
To write and publish your blog posts go to Dashboard and select Posts. Select Add New and start writing your first blog post. Right now longer blog posts, answering specific questions your readers have, tend to work better than writing about you, you, you.
You can and you should infuse your personality because this is what separates you and makes you stand out from other bloggers but don’t make it a ‘me, me, me’ post.
When I read other blog posts, it’s because I want to learn something and get tips for destinations and what to do there. I don’t care about the blog unless I find the blog posts very valuable and informative.
This is when I might come back and be interested in the person behind the blog. Many of your readers will come to your blog, having no clue who you are. They are mainly looking for tips, value, and information, wanting to be educated or entertained.
This might seem to be overwhelming the first time you create a page and a blog post, but you will become used to it very fast and it will become like second nature to you.
CREATING CATEGORIES AND TAGS
Now that you created your first blog post you want to start creating a category. You find it under Dashboard, Posts, Categories or Dashboard, Posts, Tags.
If you’re writing for example a couple of different posts about Australia you can create a category or tag called Australia. This way all your posts that are about Australia will show up in this category (or tag). If a reader searches for Australia on your blog, they will find all the Australian posts.
10. SET UP A CONTENT PLAN AKA THINK LONG TERM
When I started blogging years ago, I didn’t have a content strategy or a content plan. I was writing whenever I wanted and I randomly came up with topics.
When you invest all the energy and time into starting a travel blog, you better treat it like a business from the start. To make progress, create a content plan and strategy that helps you increase traffic and readers to your blog and not get overwhelmed.
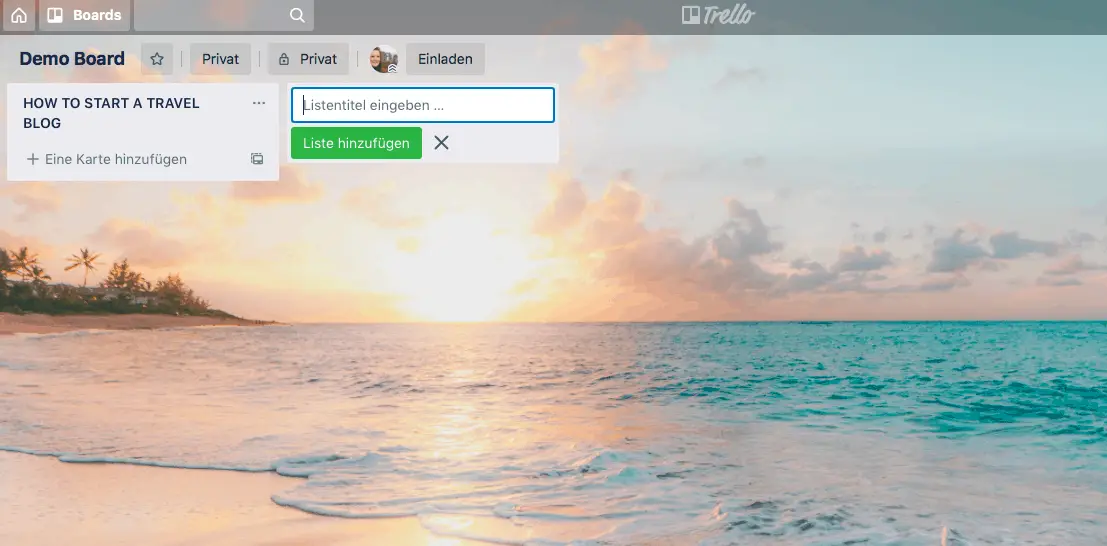
What helps me to get my content (and the 100 ideas that come up that I could write about) is to create boards and cards in Trello. I use the free version and I love it because I can link from there to my Google Drive where my articles are stored.
My Trello board overview looks like this:
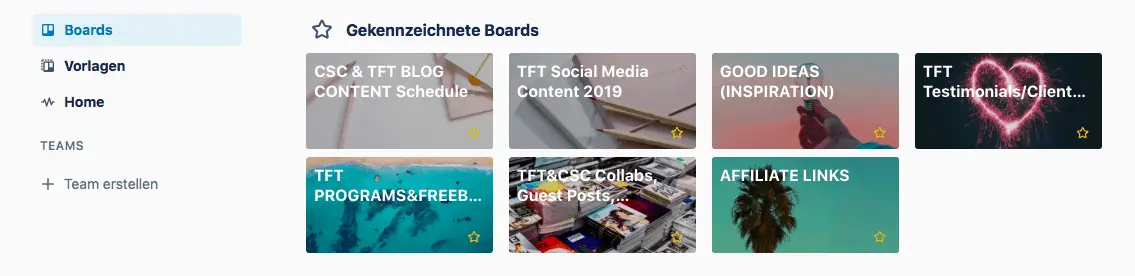
This is what a Trello board can look like. You can add cards, checklists, and attachments. Whatever you need.
You can create a content plan in your journal or somewhere else.
Find a schedule that works for you. If you don’t have enough time to write a lot of articles, write less. Quality over quantity. In the end, it should be fun for you and not feel like a chore.
11. HOW TO GET YOUR TRAVEL BLOG NOTICED: STARTING WITH SEO
SEO means Search Engine Optimization and it plays a huge role in organically increasing your traffic and your readers. It helps you to rank higher in Google and AI search, which means a higher chance that readers will find your content, click on it, and come to your website.
To get started with SEO and your travel blog noticed
A. Install Google Analytics
Sign up to and install Google Analytics. This helps you to see how many visitors, page views, and sessions you get and where your audience comes from. It gives you all the insights you need.
B. Install the Rankmath SEO plugin or Yoast SEO plugin (if you haven’t already done so in step #7)
C. Sign up for Search Console
D. Find keywords you can rank on Google
Finding keywords (= search terms) that people are looking for is the most important thing to concentrate on.
If you don’t know what your audience is looking for, you might write the most helpful and valuable post ever, but people won’t find it. You want to be strategic in what you are writing.
Guessing what people are searching for won’t get you very far. Believe me. When I started, I simply wrote blog posts and crossed my fingers that they would be found.
If you want to invest in one product that moves the needle and makes all the difference to get visitors and potential buyers to your site then I can highly recommend investing in Master Pinterest marketing in 1 Day strategy. It is amazing, I love it and I use it for every post I write. If you enter KSDISC you will receive a 20% discount.
It is very easy to work with Keysearch and they have great tutorials that show you how to use it and how to get the most out of it.
12. SHARE YOUR BLOG POSTS / MARKETING SIDE OF BLOGGING
Now it’s time to share your blog posts on your social media accounts and grow your followers. Research where your preferred audience hangs out and learn everything you need to know. Right now, Pinterest is a great medium to share your blog posts, and to receive lots of traffic, if you do it right.
You can learn all about Pinterest marketing here. If you want to dive deep into Pinterest (it’s my second largest traffic source), check out Master Pinterest In 1 Day. Pinterest is not a social media platform but a visual search engine. But if you love Instagram or Facebook or any other platform. Go for it.
At the beginning, it’s helpful to search on Facebook for FB groups for bloggers who just started. There are many out there. You can learn and grow together, find accountability, and even friends.
DOWNLOAD THIS STEP-BY-STEP GUIDE AS A FREE EBOOK (PDF)
13. MONETIZE YOUR BLOG
Now it’s time to monetize your blog. Unless you want to make your blog your hobby, which means a time-intensive hobby, the next step is to start looking for ways to earn money.
You can make money through affiliate links, sponsored posts, paid trips, and collaborations, by creating and selling your own digital or physical products, by selling ebooks, being a speaker, and so on.
You will find out which monetization method is the best to start with when you’re a new travel blogger in this post:
HOW TO START A TRAVEL BLOG AND MAKE MONEY
If there is still a question left unanswered, then leave a comment below, or book a consultation call with me (on my website thefemaletravelpreneur.com). I would love to help you. You can check out my testimonials and case studies here.
LEARN MORE:
HOW TO WORK FROM ANYWHERE IN THE WORLD: THE ULTIMATE FREEDOM LAPTOP LIFESTYLE
BLOGGING RESOURCES AND TOOLS I CAN’T LIVE WITHOUT
 Christina

Great tips for any budding travel bloggers. I will start my own travel blog once I quit my job and take to travel blogging. For that, I’ve bookmarked your post and will follow it.
Hello! I recently came across your guide on starting a travel blog, and I must say, it’s comprehensive and very insightful. As the founder of holidaytourspackage.com, I know the value of sharing genuine travel experiences with readers. Your tips resonate with many of the lessons I’ve learned in my own journey. I particularly appreciated your emphasis on authenticity and connecting with your audience; it’s something I strive for on my platform as well. Keep up the fantastic work, and I hope fellow travel enthusiasts find as much value in your content as I did!